CBA 5.325 Mod Lab East
Multimedia DeskCapabilitiesLCD Projection, Multimedia Desk, VHS, Auxiliary Input, Electronic Whiteboard ReservationsTo reserve this lab please visit Lab Reservations. |
|
Multimedia Desk Operation
|
Multimedia Desk Control Panel |
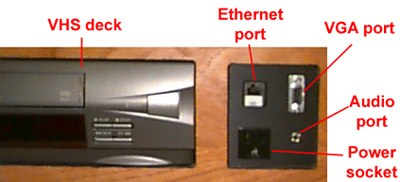
Laptop Cable ConnectionConnect a VGA cable to the desk's VGA port (located next to the VHS deck along with the other auxiliary inputs), and to the VGA port of your laptop computer. When a laptop is plugged into the desk the LCD projector will automatically switch to that input and disable the projection of the desk's computer. If your laptop's screen appears on the room's screen you are ready to go, if not, you may need to mirror your laptop's screen onto the projector. To do this on a Dell computer, hit the FN and F8 keys at the same time until you see your laptop content on the screen. Hitting FN-F8 successively will scroll through the available viewing choices. The command to mirror your laptop's screen may be different on other manufacturer's computers, if you have any questions please consult this Laptop Activation Chart. The desk also has Computer audio and Ethernet ports (PC Audio and Ethernet cables are available for checkout from Media Support), as well as one AC outlets.
|
Multimedia Desk Auxiliary Inputs |
Electronic Whiteboard3M Ideaboard IB3000 InstructionsThe electronic whiteboard allows you to accurately save and share meeting ideas. As fast as your team can generate ideas, the 3M Ideaboard IB3000 captures them for everyone to see. Ideas jotted on the board are automatically to the desk's PC. To begin, first make sure that the 3M Ideaboard is connected to the desk's PC (via serial cable) and that it is powered on.
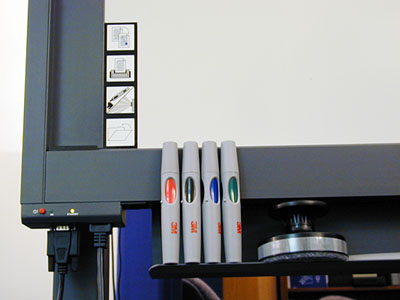
Ideaboard Markers/EraserThe illustration on the right displays the necessary 3M dry-erase markers and eraser next to the Ideakeys on the whiteboard. Only these 3M markers and eraser will be digitally recognized by both the Ideaboard and computer. |
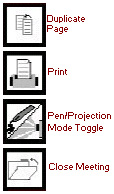
Electronic Whiteboard (3M Ideaboard IB3000) (1) Projection Button (2) Navigator Toolbar (3) Ideaboard Buttons Ideaboard 3M Markers/Eraser |