CBA 5.328-5.330 Active Learning Classrooms
|
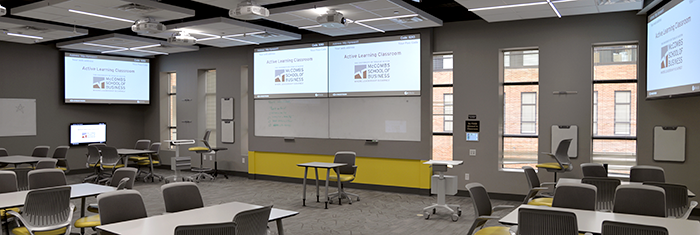
Active Learning Classrooms (ALC) offer a teaching and learning environment that makes it easier for faculty who want to expand their course design "beyond the lecture" to engage the imagination of students. The two McCombs Active Learning Classrooms are custom-designed to provide students with a diverse and interactive learning environment that takes full advantage of state-of-the-art technology. ALC highlights
Through an innovative layout of the space and flexible furniture students can collaborate in groups and have access to dedicated technology, including computer screen-sharing, whiteboards and projectors. With this equipment the instructor can employ new ways of engaging with students using collaborative learning activities and an inviting use of media that encourages participation. The design of the space lets the instructors easily switch between presenting to the entire class and consulting with individual student groups on their work. Both instructor and students can move freely around the room to collaborate and engage in conversation. In short, the ALC accommodates all different teaching modes including lecture style, team-based collaboration and group discussions to offer a well-balanced learning experience. ALC Instructions
Presenter Computer Projection |
|
Presenter Computer ProjectionAirMedia Connection and Computer PresentationThe ALC classrooms employ the Crestron AirMedia solution to allow you to present, collaborate, and share content wirelessly from your computer to the room displays.
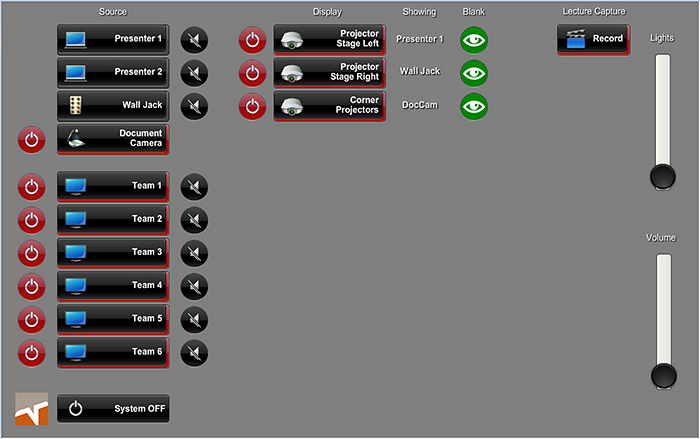
From the Source column select Presenter 1 or Presenter 2 and then choose a Display that you would like to use by pressing one of the rectangular Projector buttons. Repeat this process to have your source presented on multiple displays.
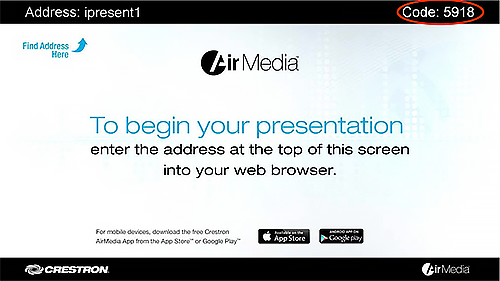
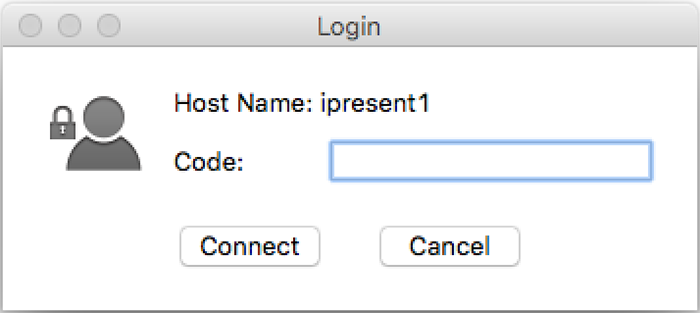
In your web browser (Chrome, Safari, Firefox, etc.) type in the Address of the wireless display indicated on the screen (in this case ipresent1) followed by “mccombs.utexas.edu” e.g. ipresent1.mccombs.utexas.edu
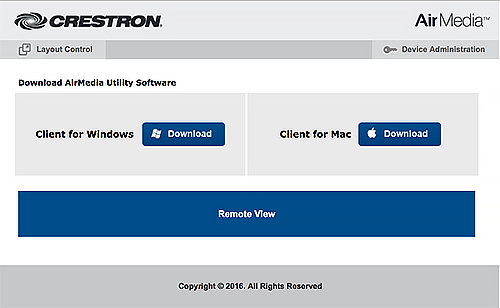
Click on Download for your platform (Windows or Mac) and follow the onscreen instructions to install the AirMedia application. Note: Mac users will need to manually run the installer that was downloaded to your machine.
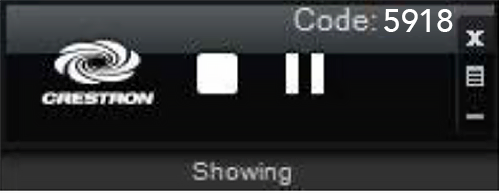
Enter the code from the projector screen that you have selected, (in the example below 5918 in the red oval.) The code will be different each time that you connect.
After you enter the screen’s code, a control panel will appear which has a square Stop button and a triangular Play/Pause toggle button.
Several presenter computers can connect to the projectors but only four can be displayed at the same time. To switch between more than four connected computers, push Stop on the machines that are not in use. |
|
Student Computer ProjectionAirMedia Connection and Computer PresentationThe ALC classrooms employ the Crestron AirMedia solution to allow you to present, collaborate, and share content wirelessly from your computer to the room displays.
Login to AirMediaWhen one of the rectangular Team buttons is selected the picture below appears on the display that you have selected:
In your web browser (Chrome, Safari, Firefox, etc.) type in the Address of the wireless display indicated on the screen (in this case iteam1) followed by “mccombs.utexas.edu”
Click on Download for your platform (Windows or Mac) and follow the onscreen instructions to install the AirMedia application. Note: Mac users will need to manually run the installer that was downloaded to your machine.
Enter the code from the projector screen that you have selected, (in the example below 5918 in the red oval.) The code will be different each time that you connect.
After you enter the screen’s code, a control panel will appear which has a square Stop button and a triangular Play/Pause toggle button.
Several presenter computers can connect to the projectors but only four can be displayed at the same time. To switch between more than four connected computers, push Stop on the machines that are not in use. |
|
ALC Interface ControlsThe interface to control the room is located on the wall next to the main projector screens. It displays controls for the various media sources and projectors as well as the built-in document camera, lighting, volume and lecture capture. AirMedia ConnectionThe ALC classrooms employ the Crestron AirMedia solution to allow you to present, collaborate, and share content wirelessly from your computer to the room displays. To Begin Using the RoomPlease login to AirMedia by following the instructions on the appropriate link below:
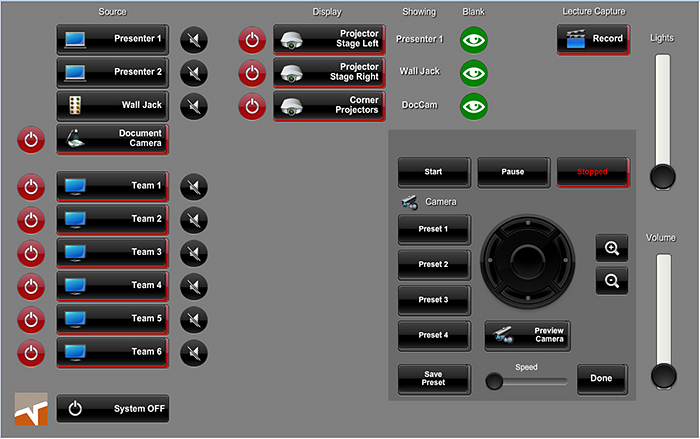
Presenter Computer Projection Computer PresentationThe ALC interface shown below has controls on its main screen for the multiple content sources and screens/projectors that can be controlled in the room.
Wall JackThe Wall Jack source will display what is connected to it’s available HDMI, VGA and audio ports. Note: the USB connector is disabled at this time. LightsThe Lights slider button adjusts the room lighting. VolumeThe Volume slider button adjusts the room volume. System OFFThe System OFF button will shut down the room
Document CameraPressing the Document Camera button brings up the screen below. Place a document on the ALC room’s wheeled lectern and move it into the square of light that is projected from the document camera mounted in the ceiling. Your document should now be displayed on any screen that you select by touching the display’s rectangular button. For example, if you touch the Document Camera button and the Corner Projectors button your document will be displayed on those screens.
You may enhance your document’s image by using the additional controls in the Document Camera window located beneath the Display buttons.
Lecture CaptureTouching the Lecture Capture button brings up the screen below. To begin using Lecture Capture press the Camera On button and select a Capture Source and Capture Format by pressing their rectangular buttons.
Video as PIP: Records the presentation content full-screen with the room video in a small picture-in-picture window.
Lecture Capture Setup ControlsPressing the Setup button in the Lecture Capture window displays the screen below. With these controls you may customize your recording by setting camera position presets, allowing you to focus on individual groups or presenters in the room at the press of a preset button.
|